Fleas Keep Coming Back? How to Get Rid of Them for Good – A 5-Step Guide for Pet Owners
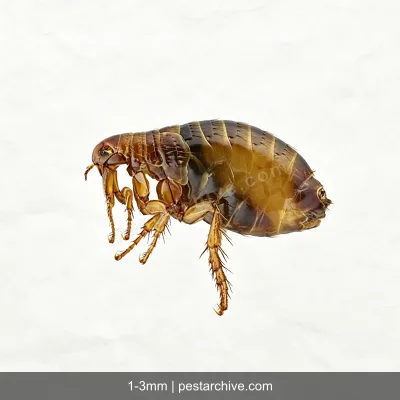
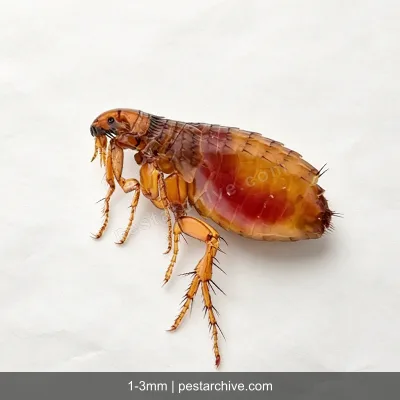
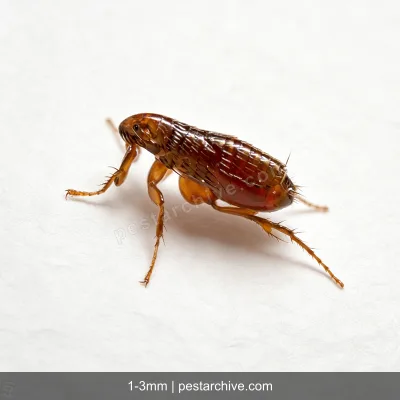
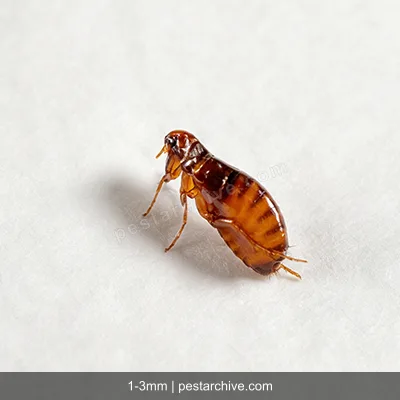
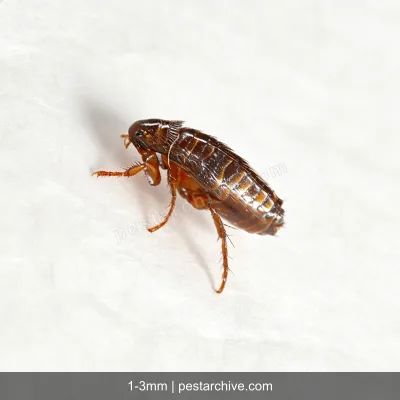
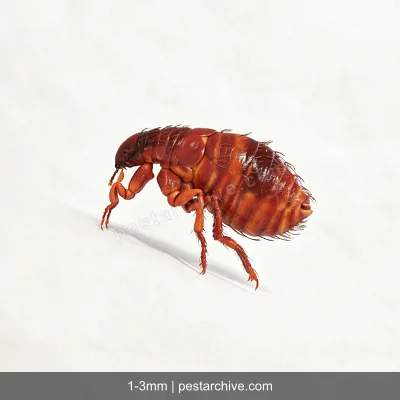
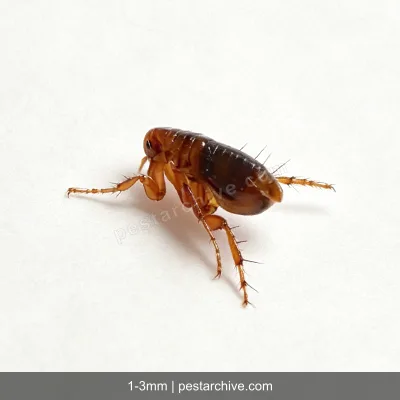
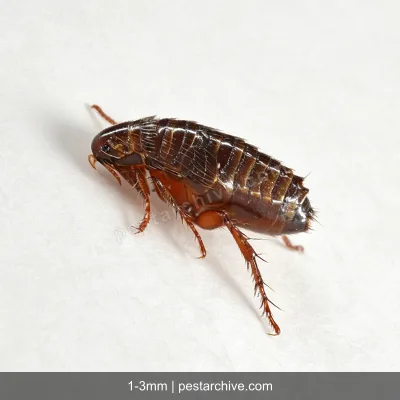
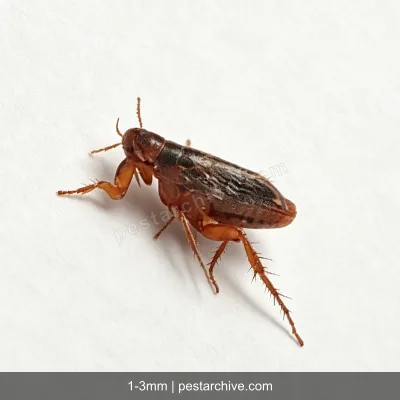
Which Flea Recurrence Pattern Are You Dealing With? 3 Common Scenarios
Pattern 1: They come back 2-3 weeks after treatment
This is the most common pattern. The flea life cycle: eggs (hatch in 2-3 days) → larvae (5-10 days) → pupae (5-14 days, can extend to months) → adults (start feeding and laying eggs). Most households do a surface clean (vacuuming, washing bedding) when they see adult fleas – but they don't kill the pupae hiding deep in floor cracks and carpet fibers. Just when you think the fleas are gone, those pupae hatch, and the cycle starts over.
Pattern 2: Pets were treated, but fleas still come back
Fleas on the pet are dead, but eggs and pupae in the environment are still there. Existing flea eggs are scattered in pet beds, carpets, sofas, and floor cracks. Pet treatments only handle fleas on the pet – not the ones in the environment. You have to treat both at the same time.
Pattern 3: No pets, but fleas keep showing up
Fleas don't just live on cats and dogs. They can come from wildlife – rats, stray cats, hedgehogs – moving around your house and dropping fleas near doors, windowsills, or balconies. Or they could be from the previous occupant (flea pupae can stay dormant for months waiting for a host signal).
What Tools Do You Need to Get Rid of Fleas for Good?
- Powerful vacuum (with HEPA filter) – the most important tool, for removing fleas at all stages
- Crevice tool attachment – for floor cracks, baseboards, sofa seams
- Steam cleaner or garment steamer – to kill eggs and larvae in fabrics with high heat
- Washing machine (140°F/60°C+ cycle) – for washing all washable fabrics
- Clothes dryer (high heat setting) – for drying and heat-killing any survivors
- Rubber gloves
- Sealable trash bags – to immediately seal and discard vacuum contents after each session
- Fine-tooth flea comb – for checking pets
- White paper towel or paper – for flea dirt testing
- Pet flea treatment products – prescribed by a vet (oral or topical) – essential
5-Step Flea Elimination Plan (Stick to the Timing)
Step 1: Treat All Pets Simultaneously (Day 1, about 30 minutes)
This is the starting point and the most important step. Take your pet to the vet and get a prescription flea treatment (oral tablet or topical drop). Don't buy OTC products – wrong dosage means either ineffective or toxic to your pet. Vet-prescribed products typically kill over 95% of adult fleas on the pet within 24 hours.
Why you must go to the vet, not self-medicate: Dosage depends on your pet's weight – too little doesn't work, too much is toxic. The vet also checks for flea allergy dermatitis and treats it at the same time.
On treatment day, use a flea comb to go through your pet's entire coat – especially neck, base of tail, belly, and armpits. The comb's teeth are extremely fine (about 0.1mm apart) and trap fleas and flea dirt. Tap the combings onto a white damp paper towel – if the specks turn reddish-brown, that's flea dirt (digested blood).
Multi-pet households: Treat all pets at the same time, even if you only saw fleas on one. Fleas don't stay on just one pet.
Step 2: Vacuum the Entire House – Remove Eggs and Larvae (Day 1, about 60 minutes)
While pets are being treated, start the environmental clean. Vacuuming is the most effective physical removal method for flea eggs and larvae:
- All carpets and rugs: Vacuum slowly (about 4 inches per second) so suction reaches deep into the fibers. Go over each area twice. Edges near walls have the highest flea egg density
- Floor cracks and baseboards: Switch to the crevice tool – go along every floor crack and baseboard top edge
- Upholstered furniture: Remove cushion covers, vacuum under cushions, in seams, and along armrest and backrest joints. These are prime pet lounging spots with the highest flea egg counts
- Beds and bedding: If your pet gets on the bed, vacuum the mattress too. Remove sheets, duvets, pillowcases for washing
- Pet areas: Pet beds, favorite corners, sunny spots on windowsills – focus here
Critical move: After vacuuming each room, immediately empty the vacuum bag or canister into a sealable trash bag, tie it tight, and put it in the outdoor trash. Don't leave it in the indoor bin – flea eggs can hatch inside and jump out of the bag.
Another benefit of vacuuming: vibration and heat stimulate flea pupae to hatch early. That means dormant pupae get activated and exposed sooner – so you can eliminate them in follow-up treatments instead of letting them surprise you weeks later.
Step 3: Heat-Wash All Washable Fabrics (Day 1, about 2 hours)
Wash every washable fabric item:
- Sheets, duvet covers, pillowcases, blankets
- Pet bed covers, pet blankets
- Sofa covers, cushion covers (if removable)
- Curtains (if pets can reach them or lie near them)
- Rugs and washable mats
Wash requirements: Water temperature at least 140°F (60°C) with regular detergent. Wash for at least 15 minutes. If fabric labels don't allow 140°F (wool, silk), switch to steam cleaning – use a steam cleaner and move slowly over the fabric surface, pausing at least 5 seconds per spot so heat penetrates the fibers.
After washing, dry on high heat for 30+ minutes. High-heat drying is even more reliable than hot washing – the dry heat penetrates deeper and kills all flea stages. For items that can't be washed or steamed (like certain cushion inserts), seal them in a plastic bag and leave in direct sunlight for a full day, or freeze at 0°F (-18°C) for 72 hours.
Step 4: Cut Off Outdoor Flea Sources (Days 1-3, about 1 hour total)
If fleas are coming from outside (brought in by wildlife), block these routes:
- Check and seal exterior gaps: Under doors, around windows, where pipes enter, and vents. Rats and other wildlife use these gaps – and bring fleas with them
- Yard maintenance: Mow grass short (under 2 inches), clear leaf piles, brush piles, and rock piles – these are outdoor flea larval habitats. If stray cats frequent your yard, lay a 24-inch (60cm) barrier of gravel or wood chips around the house – fleas avoid dry, sunny areas
- Rule out rodents: Rats are the most important wild flea hosts. If fleas keep recurring in a pet-free home, first check for rodents. Look for rodent droppings (black rice-grain sized), gnaw marks, or grease smudges in kitchen, pantry, and attic
Step 5: Monitor for 2 Weeks + Follow-Up Vacuums (Day 8 and Day 15)
Flea pupae can last 5-14 days (longer in some cases). So one cleaning round isn't enough. Follow this schedule:
- Day 1: Pet treatment + full-house vacuum + hot wash (done)
- Day 8: Second full-house vacuum. Pupae stimulated by the first vacuum may have hatched into larvae or adults – vacuum removes them
- Day 15: Third full-house vacuum. Final systematic clean to ensure any remaining pupae are dealt with
Use the same technique each time: slow passes, focus on hot spots, seal and discard vacuum contents immediately.
Ongoing monitoring: From Day 1 to Day 21, do a flea check every 2-3 days. Wear white socks and walk through every room (especially near carpets and sofas) – then check the socks for fleas (tiny dark specks that jump). If you see zero fleas on white socks after Day 15, you've succeeded.
How Do You Know Fleas Are Gone for Good?
Week 1: Pet stops scratching. No flea dirt comes off on the flea comb.
Week 2: White-sock test shows no fleas. No new bites on your ankles.
Week 3: After the third vacuum, white-sock test is still zero. You can call it done.
What counts as failure: White-sock test still shows fleas after Day 21, or you're still getting new bites. That means there's an untreated flea source – possibly eggs inside a pet bed cushion, pupae deep in carpet or sofa, or an ongoing outdoor source (rodents or stray cats). Re-investigate. If three full-house vacuums plus pet treatments still leave fleas, call a licensed pest control company. Professionals can use insect growth regulators (IGRs) – these don't kill adults directly but prevent larvae from maturing, breaking the life cycle at the root. IGRs are much safer for people and pets than traditional insecticides.
What NOT to Do When Eliminating Fleas
- Pet owners: NEVER use dog flea products on cats. Some ingredients in dog flea treatments are highly toxic to cats and can be fatal. Cats need cat-specific flea products.
- Don't treat pets without cleaning the environment: Only about 5% of a flea population is adults (on pets) – the other 95% are eggs, larvae, and pupae in the environment. Treating pets alone fixes 5% of the problem.
- Don't spray insecticide before vacuuming: Spraying first drives fleas deeper into carpets and crevices. The chemicals sit on dust, not on fleas. The correct order is always vacuum first, then treat.
- Don't use bleach to mop floors for fleas: Bleach is almost useless against flea eggs and pupae – egg shells are dense and impermeable.
- Don't quit early: Successful flea elimination depends on sticking to the schedule. Most people fail because they stop after the first week when flea numbers look lower – and then the pupae hatch.
Long-Term Flea Prevention Plan
7-day: Check your pet with a flea comb once a week. Vacuum key areas at least twice a week. Wash pet bedding weekly.
15-day: Do a white-sock test. Check your pet's flea prevention expiration date (orals usually 1 month, topicals 1 month) and refill on time without gaps.
30-day: Apply your pet's monthly flea preventative on schedule – even in winter. Modern homes stay warm enough for fleas to be active year-round; you just see fewer because there's less outdoor exposure.
Flea Elimination Checklist
- Did all pets (not just the one with fleas) get vet-prescribed flea treatment?
- Did you vacuum every carpet, floor crack, sofa, and pet bed thoroughly?
- Did you wash all washable fabrics in 140°F+ water and dry on high heat?
- Did you seal and discard vacuum contents in outdoor trash every time?
- Did you focus extra attention on pet beds and pet lounging spots?
- Did you do the second and third full-house vacuums on Day 8 and Day 15?
- Did you check and block outdoor sources (rodents, stray cats)?
- Did the white-sock test show zero fleas on Day 21?
- Are you continuing monthly flea prevention for your pets without interruption?
Flea FAQs
Why is vacuuming the single most important flea control tool?
Vacuuming does three things: 1) Physically removes flea eggs, larvae, and pupae from carpet fibers and floor cracks. 2) Vibration stimulates dormant pupae to hatch early, shortening the flea's hiding period. 3) Removes the larval food source (adult flea feces and organic debris), starving surviving larvae. A good vacuum with HEPA filtration can remove about 90% of flea eggs and larvae from the environment – a physical removal rate no insecticide can match.
Can I skip the dryer if I don't have one?
Yes. Alternatives: sun-dry washed fabrics in direct sunlight for a full day (UV + heat). Or use a steam cleaner/garment steamer on fabric surfaces. Or seal fabrics in a black plastic bag and leave in summer midday sun for 3-4 hours – internal temps reach 120-140°F (50-60°C), enough to kill all flea stages. If none of those are possible, go over fabric surfaces with a steam iron.
What if my pet is allergic to flea treatments or too old for them?
Consult your vet about switching to physical methods: use a flea comb daily on your pet, dropping combings into soapy water (fleas drown). Flea combing plus strict environmental management (Steps 2-5 in this guide) can keep pets flea-free without any medication. But physical methods require daily effort – much more work than medication.
* * * 6. Bed Bugs