How to Get Rid of Grain Mites in Your Pantry?

You open a bag of flour, and the surface looks dusty — not the fine white powder you expected, but a faintly brownish, moving layer. Rub a pinch between your fingers, and you notice a strange minty smell. That is not dust. Those are Grain Mites — thousands of them.
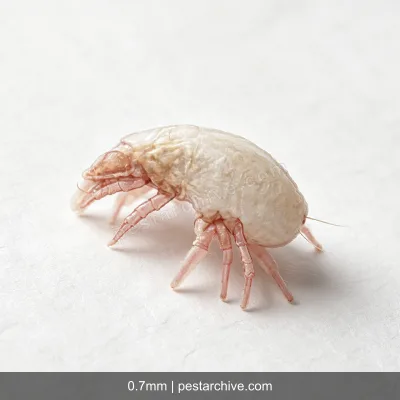
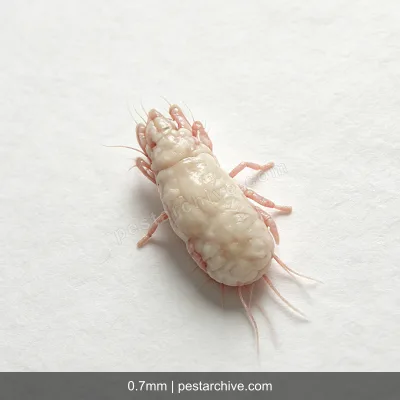
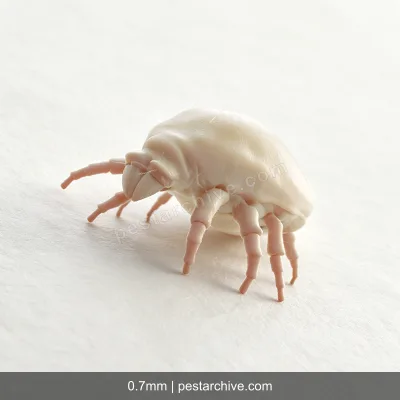
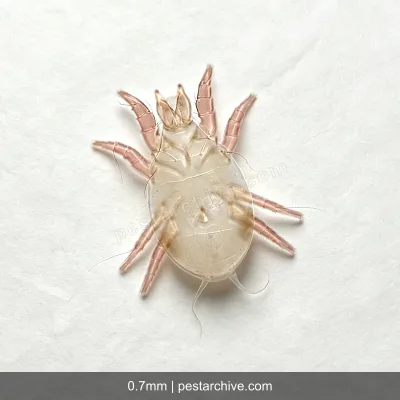
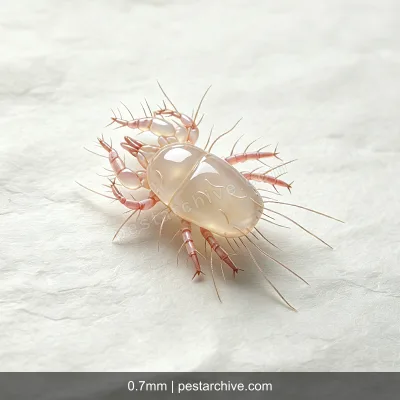
Grain Mites (*Acarus siro*) are among the most common and destructive pests of stored dry foods. Barely visible to the naked eye (0.2–0.5 mm), they thrive in flour, cereal, rice, oats, dried fruit, cheese, and pet food. An infestation can render an entire pantry's contents unfit for human consumption — and the problem spreads fast because a single female lays up to 800 eggs over her 2-week lifespan.
### How Grain Mites Get In and Why They Explode
Grain Mites are already present in most grain products when you buy them — at very low numbers that are harmless. The infestation takes off when two conditions align:
- High humidity. Grain Mites need relative humidity above 65% (ideally 75–85%). A humid pantry, a damp basement, or a poorly ventilated kitchen cabinet is their paradise.
- Warm temperature. They breed fastest at 25–30 °C (77–86 °F). In cool, dry storage, they remain dormant or die off.
Once conditions are right, populations can double every 2–3 days. Within a week, a bag of flour that looked perfectly fine can become a writhing mass of mites and their webbing.
### Signs of a Grain Mite Infestation
- "Mite dust" — a brownish, fine powder on the surface of grains or on pantry shelves. It is actually living mites, dead mites, cast skins, and feces.
- Minty or sweet odor — crushed Grain Mites release a distinctive minty smell (some describe it as honey-like).
- Webbing — fine silk-like threads between grains, produced by the mites as they move.
- Clumped or discolored food — heavy infestations cause flour to clump, cereal to discolor, and grain to taste bitter or off.
- Allergic reactions — handling infested food can trigger skin itching, redness, or respiratory irritation.
### Step 1: Discard All Infested Food
This is painful but necessary. Grain Mites penetrate deep into food — you cannot wash, sift, or cook them out. Any item that shows mite dust, webbing, or the telltale odor must be thrown away immediately.
- Check every bag, box, and jar. Do not assume adjacent items are safe — mites crawl between packages.
- Seal discarded food in plastic bags before placing it in the outdoor trash. Do not leave it in the kitchen garbage.
- Inspect pet food and birdseed too — these are common reservoirs.
### Step 2: Deep-Clean the Pantry
- Remove everything from shelves and vacuum all surfaces, cracks, and corners thoroughly.
- Wash shelves with hot water and dish soap, then wipe with a cloth dampened with white vinegar. Vinegar helps kill residual mites and dissolves their webbing.
- Let the pantry dry completely before restocking. Any residual moisture will invite a new infestation.
### Step 3: Lower Humidity — The Long-Term Fix
Grain Mites cannot survive below 60% relative humidity. Make your pantry hostile to them:
- Place silica gel desiccant packets on shelves (recharge or replace them monthly).
- Run a dehumidifier in the kitchen or adjacent room, targeting humidity below 50%.
- Ensure good ventilation — do not block air circulation behind stored items.
- Store food away from damp walls, windows, or plumbing.
### Step 4: Repackage in Sealed Containers
All dry goods — flour, rice, cereal, pasta, oats, pet food — should be transferred from their original bags into sealed containers with tight-fitting lids. Glass jars, food-grade plastic containers with screw-on lids, and airtight canisters all work well. This creates a physical barrier that mites cannot penetrate, even if humidity rises.
### Step 5: Temperature Control
- Store susceptible items (flour, grains, cereal) in the refrigerator or freezer if your pantry tends to be humid. Grain Mites cannot reproduce below 5 °C (41 °F) and die at freezing temperatures.
- When buying new dry goods, freeze them for 4–7 days before transferring to pantry containers. This kills any mites or eggs already present in the product.
### Step 6: Regular Monitoring
- Inspect stored food every 2–3 weeks. Look for mite dust, webbing, or odor.
- Replace silica gel desiccant packets when they lose effectiveness.
- Wipe pantry shelves with vinegar every month as a preventive measure.